Configuring SSL on Jenkins using Let's Encrypt and NGINX reverse proxy!
28 July 2016 on Let's-Encrypt and Jenkins. 5 minutes
Let’s Encrypt Certificate Authority (CA) provides free TLS/SSL certificates to enable encrypted HTTPS on web servers. This can be used to obtain a free SSL certificate, which can be installed manually on our Jenkins installation.
Here, We can configure free SSL certificate for a Jenkins installation on Ubuntu 16.04 and will configure to automatically renew SSL certificate.
###Installing Let’s Encrypt Client in the server
switch to root user and Clone the Let’s Encrypt Client repo from the github (Install git apt-get install git)
git clone https://github.com/letsencrypt/letsencrypt /opt/letsencrypt
This will clone the repo to /opt/letsencrypt folder.
###Installing NGINX server
If you haven’t installed NGINX on the system, you can install it with this command, We need this to setup reverse proxy for Jenkins.
apt-get install nginx
###Allowing Let’s Encrypt to Valdate the domain and server
Let’s Encrypt has many ways to obtain SSL certificates with the help of various plugins. Here we use the webroot plugin to get the certificate.
This plugin will place a specific file in /.well-known directory in our configured server to validate the domain and server. So, We have to make sure the file is accessible by the Let’s Encrypt server for validation. For that we have to update the NGINX configuation. The default site configuaration file is located at /etc/nginx/sites-available/default. We can edit that with vim/nano
vim /etc/nginx/sites-available/default
and add the below location block to the configuration, Don’t foget to update the server_name name with your domain.
server {
  listen 80;
  server_name jenkins.your-domain.com;

  location '/.well-known/acme-challenge' {
    default_type "text/plain";
    root      /var/www/letsencrypt;
    allow all;
  }
}
Now verify the configuration file and reload NGINX to update the configuration we changed.
sudo nginx -t && sudo nginx -s reload
###Creating a Template for the Let’s Encrypt
We have to create a template file with the values that Let’s Encrypt needed while generating the cerificate. Otherwise we have to provide these values as parameters for the Let’s Encrypt command line.
Create a file /etc/letsencrypt/configs/your-domain.conf Don’t forget to replace your-domain with your fully qualified domain name. Copy the following contents and set the correct values in the domains (fully qualified domain name), rsa‑key‑size and email fields.
# generate certificates for the specified domains.
domains = your-fully-qualified-domain

# use a 4096 bit RSA key instead of 2048
rsa-key-size = 2048 # Or 4096

# register certs with the following email address
# this Email address will receive renewal reminders
email = [email protected]

# use the webroot authenticator.
authenticator = webroot

# the following path needs to be served by our webserver
# to validate our domains
webroot-path = /var/www/letsencrypt/
###Requesting the Certificate
Now we can request the Let’s Encrypt to generate the certificate for our domain. Go to the folder where we cloned the Let’s Encrypt client
cd /opt/letsencrypt
Then Sent the request to generate the certiicates.
./letsencrypt-auto --config /etc/letsencrypt/configs/your-domain.conf certonly
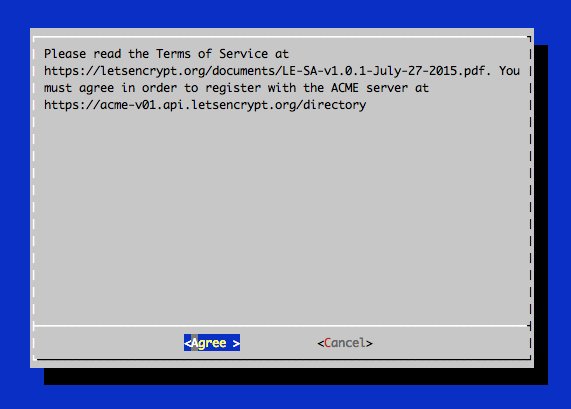
You must agree to the Let’s Encrypt Subscribe Agreement. Select Agree for the following Question.
If everything fine, this will generate the two certificates files and stores in /etc/letsencrypt/live/your-domain as fullchain.pem and privkey.pem.
###Installing Jenkins (Skip this if already installed)
Now we have to install Jenkins in the server. run the following commands to install Jenkins.
wget -q -O - https://jenkins-ci.org/debian/jenkins-ci.org.key | sudo apt-key add -
sudo sh -c 'echo deb http://pkg.jenkins-ci.org/debian-stable binary/ > /etc/apt/sources.list.d/jenkins.list'
sudo apt-get update
sudo apt-get install jenkins
###Configuring Jenkins behind the NGINX reverse proxy
Update the NGINX site configuration file to work as a reverse proxy.
vim /etc/nginx/sites-available/default
Copy the following content and update accordingly. Don’t forget to update the domain names and certificat path with your correct values.
upstream jenkins {
  server 127.0.0.1:8080 fail_timeout=0;
}

server {
  listen 80;
  server_name jenkins.your-domain.com;

  location / {
    return 301 https://$host$request_uri;
  }

  location '/.well-known/acme-challenge' {
    default_type "text/plain";
    root      /var/www/letsencrypt;
    allow all;
  }
}

server {
  listen 443 ssl;
  server_name jenkins.your-domain.com;

  ssl_certificate /etc/letsencrypt/live/jenkins.your-domain.com/fullchain.pem;
  ssl_certificate_key /etc/letsencrypt/live/jenkins.your-domain.com/privkey.pem;

  ssl_protocols TLSv1 TLSv1.1 TLSv1.2;
  ssl_prefer_server_ciphers on;
  ssl_dhparam /etc/nginx/ssl.crt/dhparams.pem;
  ssl_ciphers 'ECDHE-RSA-AES128-GCM-SHA256:ECDHE-ECDSA-AES128-GCM-SHA256:ECDHE-RSA-AES256-GCM-SHA384:ECDHE-ECDSA-AES256-GCM-SHA384:DHE-RSA-AES128-GCM-SHA256:DHE-DSS-AES128-GCM-SHA256:kEDH+AESGCM:ECDHE-RSA-AES128-SHA256:ECDHE-ECDSA-AES128-SHA256:ECDHE-RSA-AES128-SHA:ECDHE-ECDSA-AES128-SHA:ECDHE-RSA-AES256-SHA384:ECDHE-ECDSA-AES256-SHA384:ECDHE-RSA-AES256-SHA:ECDHE-ECDSA-AES256-SHA:DHE-RSA-AES128-SHA256:DHE-RSA-AES128-SHA:DHE-DSS-AES128-SHA256:DHE-RSA-AES256-SHA256:DHE-DSS-AES256-SHA:DHE-RSA-AES256-SHA:AES128-GCM-SHA256:AES256-GCM-SHA384:AES128-SHA256:AES256-SHA256:AES128-SHA:AES256-SHA:AES:CAMELLIA:DES-CBC3-SHA:!aNULL:!eNULL:!EXPORT:!DES:!RC4:!MD5:!PSK:!aECDH:!EDH-DSS-DES-CBC3-SHA:!EDH-RSA-DES-CBC3-SHA:!KRB5-DES-CBC3-SHA';
  ssl_session_timeout 1d;
  ssl_session_cache shared:SSL:50m;
  ssl_stapling on;
  ssl_stapling_verify on;
  add_header Strict-Transport-Security max-age=15768000;


  location / {
    proxy_set_header        Host $host:$server_port;
    proxy_set_header        X-Real-IP $remote_addr;
    proxy_set_header        X-Forwarded-For $proxy_add_x_forwarded_for;
    proxy_set_header        X-Forwarded-Proto $scheme;
    proxy_redirect http:// https://;
    proxy_buffering off;
    proxy_pass              http://jenkins;
  }

}
Verify the configuration file and restart NGINX to load the new certificates:
nginx -t && sudo nginx -s restart
###Configuring auto Renewal of Let’s Encrypt Certificates
Let’s Encrypt certificates are valid only for 3months (90 days), So we have to renew the cerificates whith in three months. We can configure this to auto renew using a cron job.
create an script that can be configured in monthly cron job. Copy the following and create a file /etc/cron.monthly/renew-ssl-your-domain.sh Make sure the file has enough permission. Also, make sure the folder /var/log/letsencrypt/ exists to save the log.
#!/bin/bash

cd /opt/letsencrypt/
./letsencrypt-auto --config /etc/letsencrypt/configs/your-domain.conf certonly

if [ $? -ne 0 ]
 then
        ERRORLOG=`tail /var/log/letsencrypt/letsencrypt.log`
        echo -e "The Let's Encrypt cert has not been renewed! \n \n" \
                 $ERRORLOG
 else
        nginx -s reload
fi

exit 0